|
Seat
Construction |
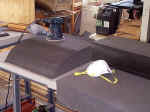 |
A chunk of Minicell closed-cell foam
16" x 24" x 4" thick is being cut to the hull contours in the
cockpit. I used my Japanese pull-saw to rough trim it, and then
sanded it to shape with my trusty ROS and a 40 grit disk. I used the
#6 form as a starting point, and hand fit the taper. |
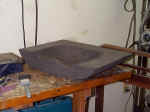 |
After the base fit the cockpit
properly, I started carving the seat to fit my bottom . . . I used
the ROS again, stopping frequently and then sitting in it to test for
comfort. To maintain a low center of gravity (stability), the foam
is only 3/4" thick at its lowest point, where my butt-bone rests.
Minicell foam is crap to work with, it tears and shreds and looks only
standoff OK. I am working on a means of finishing it so it matches
the quality of the rest of the kayak. |
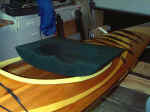 |
I ended up changing the shape of the
seat after discussing it with LOTS of member's of Nick's KBBS. Overall
dimensions - 16" long x 23" wide x 4" deep. The height above the hull in
back is 1/2", at the thighs it is 3". Deepest part of seat is 12"
behind front surface. Another poster recommended Lycra as a
covering, and I found I Cotton-Lycra blend in a great shade of green that
I covered the seat with. I used contact cement and the very stretchy
fabric conformed to the contours marvelously. |
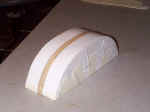 |
To make the seatback, I first cut a
piece of spruce to the shape I wanted. The curve at the rear of the
coaming was so close to the curve my wife obtained of my back, using a
flexible curve tool, that I simply traced the coaming curve onto the
wood. I then contact cemented more sandable surfboard foam onto
either side, and sanded it to shape. Lastly I stretched kitchen wrap
over the foam to act as a release agent, and taped it in
place. |
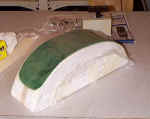 |
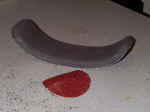
Experiment #1 - I made a sandwich of
a layer of 6oz glass, a piece of green felt, and a second layer of 6oz
glass. I used a total of 2oz of epoxy. The entire layup was held flat with
more kitchen wrap stretched over the surface. It really doesn't have
to be too strong, just reasonably rigid. When it cures, it will be
laminated with thin Minicell foam covered in the Lycra cloth. This
will simply serve as the backbone for the seat back. |
|
|
 |
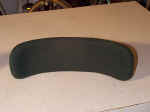
After the seatback form cured, I
sliced off a 3/4" piece of Minicell and contact cemented it to the
fiberglass form. This picture is midway through the shaping
process. I have settled on a 40 grit sanding disk as my preferred
method of shaping the foam. |
 |
After shaping the foam to the
fiberglass backbone, I covered it with the cotton/Lycra fabric so it
matches the seat. Again, contact cement was used, and the fabric was
stretched clear around the fiberglass backbone. I then trimmed it
with a razor blade such that 1/2" overlap was left on the back of the
seatback. |
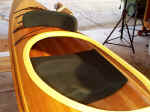 |
This photo shows the size of the
backrest in perspective to the coaming and seat. The next step is
attaching it to the kayak, and I have devised a new approach that I think
should work well - - I hope! |
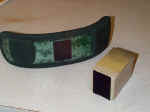 |
I added 2 cloth covered Minicell
"bumpers" and a piece of Velcro to the back of the seat. In the
foreground is a piece of Minicell carved to the seat back contour with
Velcro on its front face. This piece (notice the contact cement on
the top surface) will be glued under the deck and serve as the attachment
for the seat back. The seat will make 3-point contact with this
block and the coaming via the padded blocks. |
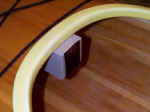 |
Here is a close up of the Minicell
block contact cemented in place. My thought was that the small area
behind the seat can be used for storage and accessed simply by pulling off
the backrest. I will add a safety line to the seat back so it can't
be permanently lost if it pops off in adverse
conditions. |
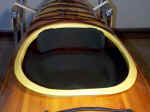 |
The complete seating area with the
seatback pressed in place. The Velcro holds it pretty darn snugly,
that was my major concern. It takes a bit of effort to remove the
backrest. |
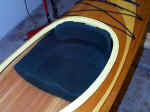 |
Another angle of the cockpit.
I might cover the visible portion of the back support with the same cloth
as the rest. Right now it is tan colored vinyl spray (I knew that
stuff would come in handy!). |
|
|
|
Change of
Plans
As nice as it looked, the above
solution was not very comfortable, and adjustment was very difficult
(reshaping the foam support block). I decided to switch to a
suspended seat back, as shown below. |
 |
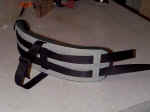
I did a fiberglass layup of 4 layers
of 6oz cloth over a 10" long x 1" wide x 1/8" thick piece of wood
covered with kitchen wrap to produce a channel as shown on the left.
From this I cut 7 strips about 1/2" wide to use as webbing guides, like
the one shown on the right side of this picture. |
 |
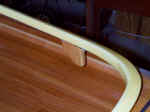
I used epoxy thickened with milled
fiberglass to attach 6 of these guides to the fiberglass back of my seat
back. Lastly, I covered the entire back with a piece of stiff cloth
by contact cementing it in place. This was done to make the assembly look
good! I cut slits into the cloth to allow the webbing to pass
under the fiberglass guides. The picture shows 1" nylon webbing
temporarily threaded through the guides as it will be used in the final
assembly. |
 |
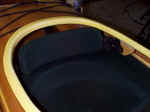
To accomodate the new hanging seat
back I shaped and slotted two pieces of spruce to thread the webbing
through. I attached these to the underside along the cockpit coaming
using epoxy thickened with milled glass fibers. I used a generous
fillet behind and along the sides for strength. |
 |
The seat back is now hanging in
place with more adjustments available to really get the comfort level up.
There are two wood blocks attached on either side of the seat with slots
in them, to accommodate the nylon webbing that threads through the seat
back. Each strap is independently adjustable to fix the angle of the
back. A third loop of webbing threads from the top to the bottom of
the seat back to set its
height. |